[CZ] Tento článek cílím primárně na anglicky mluvící čtenáře, protože nečekám až tak moc kutilů s Ozoboty v čechách, kteří by neporozuměli fotkám a anglickým popiskům.[/CZ]
My kids‘ Ozobot gradually lost its battery capacity over time, leading to frequent shutdowns and making playtime more about waiting for it to recharge. Considering it’s not an inexpensive toy, I’ve decided to attempt a battery replacement. Unfortunately, the manufacturer doesn’t provide spare parts or service instructions.
The article isn’t complete yet. I’ve disassembled the robot, measured the battery, and I’m ordering a replacement. However, I believe that with the described procedure, the rest will be a breeze. To disassemble it, you’ll need the appropriate Torx screwdriver. It’s advantageous that the manufacturer used only one size of screws, preventing confusion. Also, having a small tray or bowl for the parts will be useful to prevent any loss.
Let’s begin by clearing the workspace on the table 🙂 and if applicable, remove the silicone cover from the Ozobot. First, loosen the screw located on the backside underneath the micro USB port.
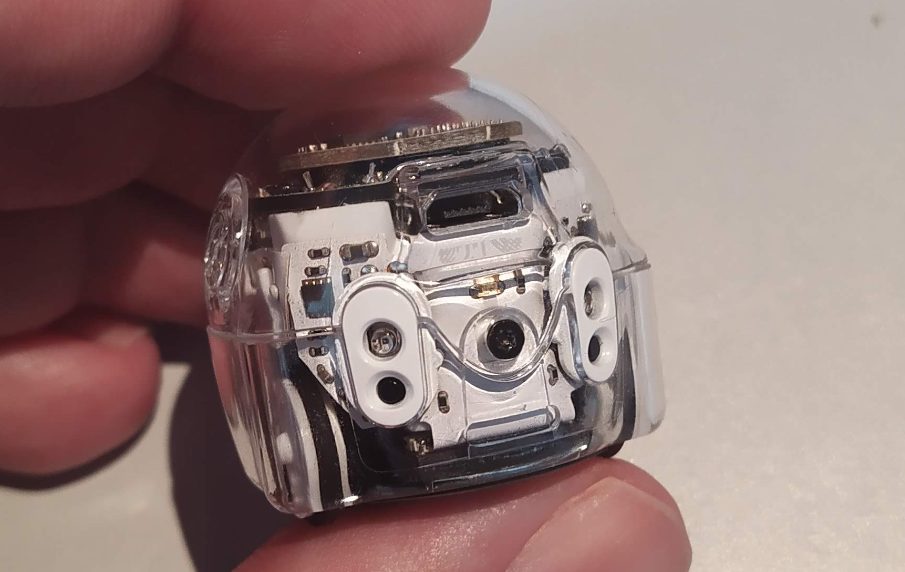
This screw is the only one securing the upper half of the plexiglass cover in place. Now, it’s possible to remove the upper half by gently pulling it upward and simultaneously unhooking the latches on the front. To release the latch, you can press it with, for example, a screwdriver through the upper opening on the front side of the robot.
Next, you’ll need to loosen the three screws from the bottom side. Be careful, as the black bottom cover will then come off.
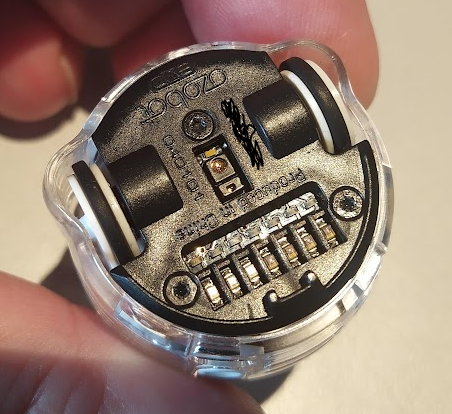

Now comes the most challenging operation: pushing the robot out from the bottom half of the plexiglass cover. The lower PCB with LEDs and sensors obstructs this process the most. This PCB is connected via a flex cable located on the rear side, almost between the wheels. Access to it is quite difficult, but the plexiglass cover can be removed by slightly bending the PCB. Be extremely cautious as damaging the flex cable would be complex, if not impossible, to repair. When pushing it out, the wheels or the covers of the infrared sensors might fall out.
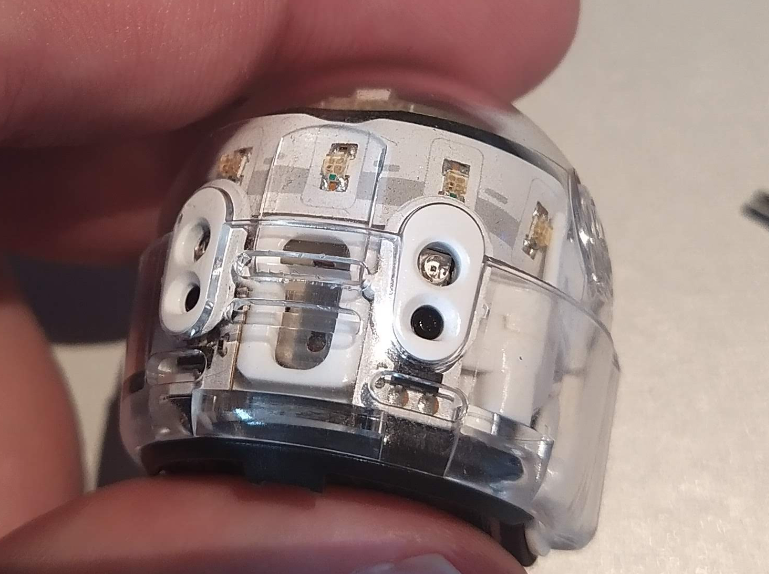
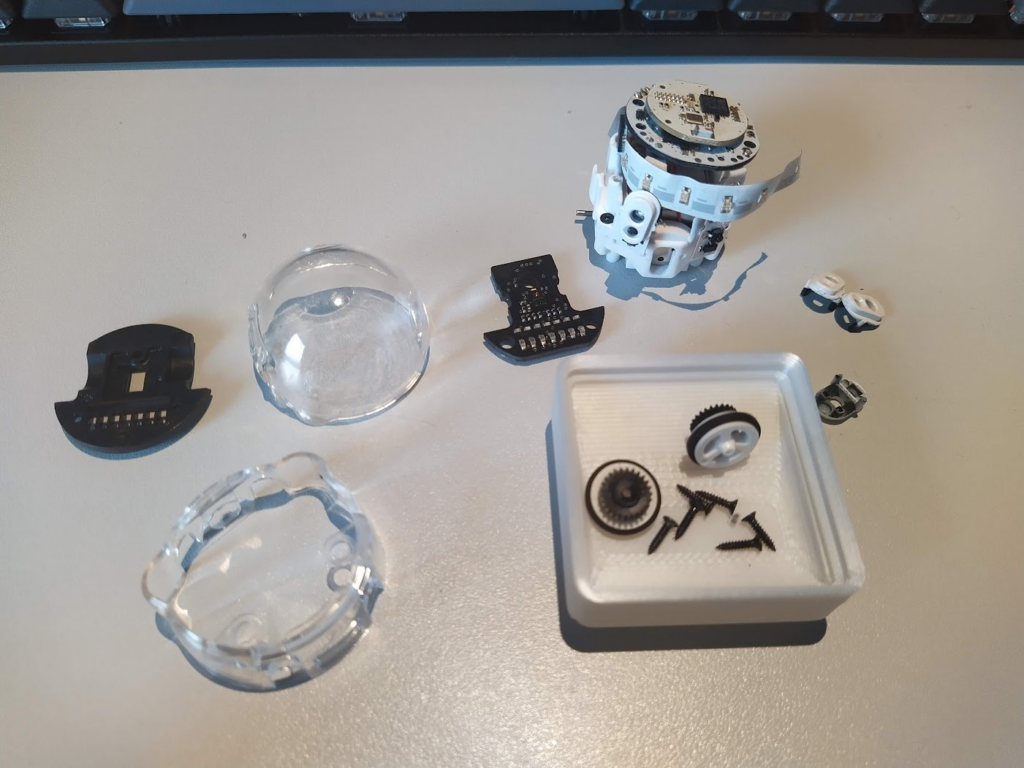
Now, I recommend removing the wheels and covers of the infrared sensors. The details of each component can be seen in the last picture.
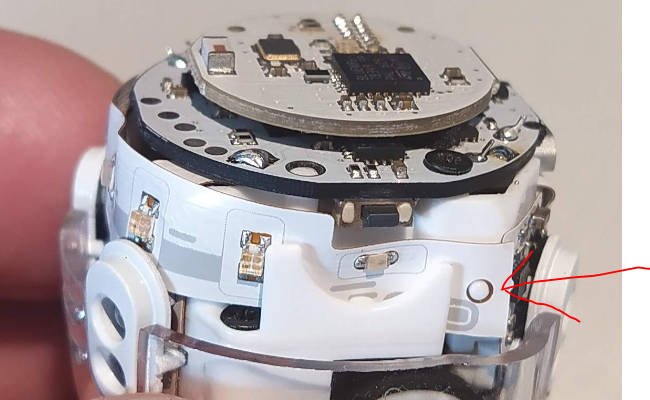
After loosening the two screws from the lower of the two upper PCBs, you can begin releasing the flex PCB from the robot’s body. This allows the pair of upper PCBs to be maneuvered sideways to access the battery compartment. The flex PCB is held onto the body by a few tabs, as shown in the following picture.
Now, you can access the battery. Unfortunately, I forgot to take a picture of what’s inside. Inside, there’s a LiPo battery with the following specifications: 50mWh 135mAh 3.7V, with dimensions of 17x17x5.5mm. I’ll try to order a replacement from AliExpress, and later on, I’ll add the link and details of how the replacement went.
Napsat komentář